Troubleshooting Guide
Transactions Feature
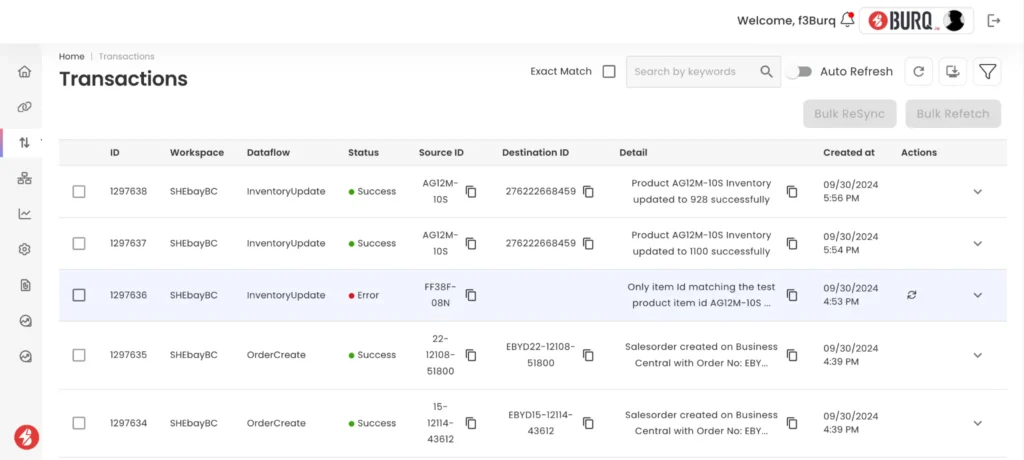
The Transactions page in the Burq App provides a detailed log of every transaction performed during job executions between systems. Each transaction represents
the flow of data such as inventory updates and order creations between connected platforms.
Key Features of the Transactions Page
Transaction Record
Each transaction is displayed in a tabular format with several key columns, including:
- ID: Unique identifier for each transaction.
- Workspace: Name of the workspace where the transaction occurs, typically representing a specific ERP or platform connection (e.g., SHEbayBC).
- Dataflow: Type of operation performed in the transaction (e.g., InventoryUpdate, OrderCreate).
- Status: Indicates whether the transaction was successful (Success) or encountered an issue (Error), along with color-coded icons (green for success, red for errors)
- Source ID & Destination ID: Identifiers from the source and destination systems, used to track the movement of data (e.g., product IDs for inventory updates or order IDs for sales orders).
- Detail: Brief description of what happened in the transaction, such as the quantity of inventory updated or the creation of a sales order.
- Created at: Timestamp of when the transaction was logged.
- Actions: Additional controls for managing transactions, such as retrying failed transactions.
Transaction Management
- Bulk Resync / Bulk Refetch: Options to resync or refetch multiple transactions at once. This feature can be useful when resolving bulk errors or reprocessing transactions after system updates.
- Search and Filtering: Users can search for specific transactions using keywords or filter results by status (success, error, etc.) to quickly locate specific transaction types or those requiring attention.
Automatic and Manual Refresh
- Users can enable or disable automatic refreshing of the transactions table to view real-time updates as new transactions are processed.
- Manual Refresh Controls: Additional buttons for manually refreshing the transaction data.
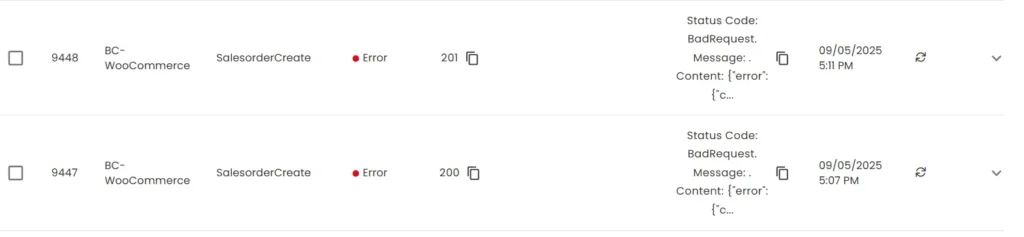
Detailed Error Handling:
When a transaction encounters an error, detailed logs and messages are displayed in the Detail column. Users can retry these failed transactions by clicking the retry button in the Actions column
User Notifications:
The page includes notifications (e.g., a bell icon in the top right corner) to inform users of any system alerts, errors, or updates that may require their attention.
Download Transactions:
A download button is available on the Transactions page, allowing users to export the transaction data in CSV format. This is especially useful for further analysis, reporting, or record-keeping. Users can download the entire transaction log or filtered data based on their search and filtering criteria.
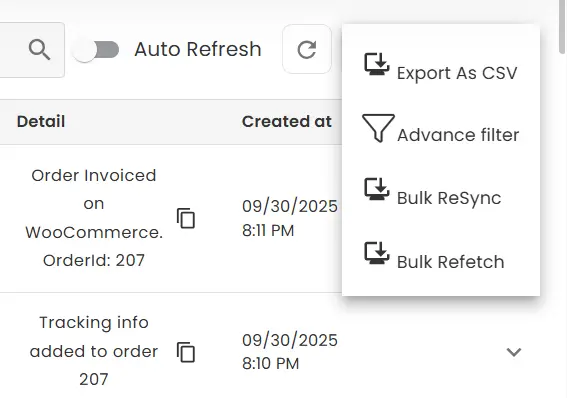
Advanced Filtering and Search Options
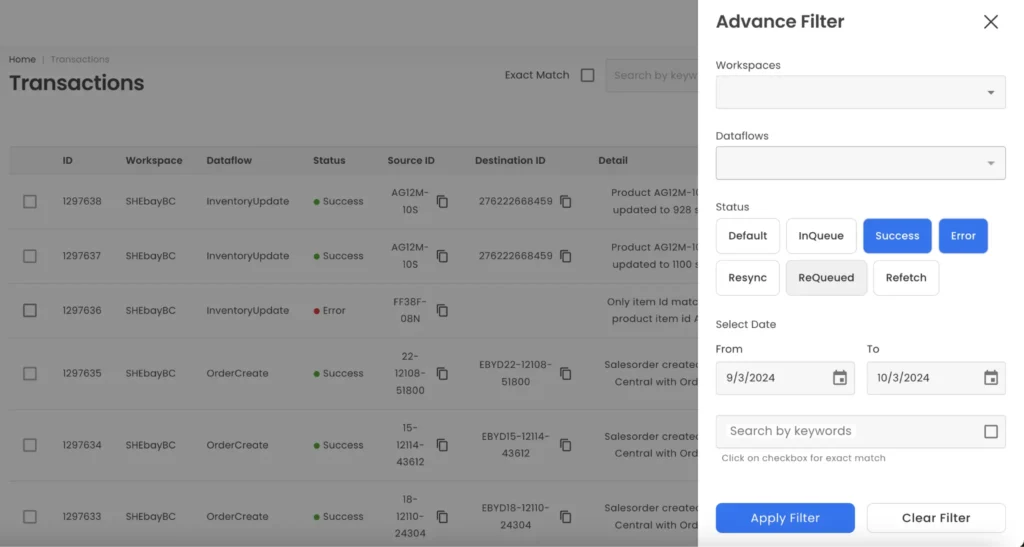
The Transactions page includes an advanced filtering feature, allowing users to refine the displayed transactions according to various criteria:
Workspaces Filter:
Allows users to filter transactions by selecting specific workspaces, such as integrations with particular platforms (e.g., Shopify, eBay, or Magento).
Dataflows Filter:
Users can filter transactions based on the type of dataflow, such as InventoryUpdate, OrderCreate, or other operations defined in the system.
Status Filter:
Users can filter the transactions based on the status of the transactions. The available status filters include:
- Default: Displays all transactions regardless of their status.
- InQueue: Shows transactions that are queued and waiting to be processed.
- Success: Filters and displays only successful transactions.
- Error: Displays transactions that encountered errors.
- Resync: Shows transactions that are marked for resynchronization.
- ReQueued: Displays transactions that have been requeued for processing.
- Refetch: Shows transactions where a data refetch was requested.
Date Range Filter:
Users can define a custom date range by selecting a start date (From) and an end date (To). This enables users to narrow down transactions within a specific period.
Keyword Search:
The keyword search allows users to search for specific transactions by typing relevant keywords. If the user selects the “Exact Match” option, the search will return only transactions that exactly match the keyword.
Apply and Clear Filters:
- Apply Filter: Users can apply their selected filters to the transaction data by clicking the “Apply Filter” button.
- Clear Filter: Clicking the “Clear Filter” button will remove all selected filters, returning the view to show all transactions.
Transaction Detail Page
Transaction Detail Page contains detailed information about a specific transaction. The page is divided into four tabs, each containing different types of data about the transaction.
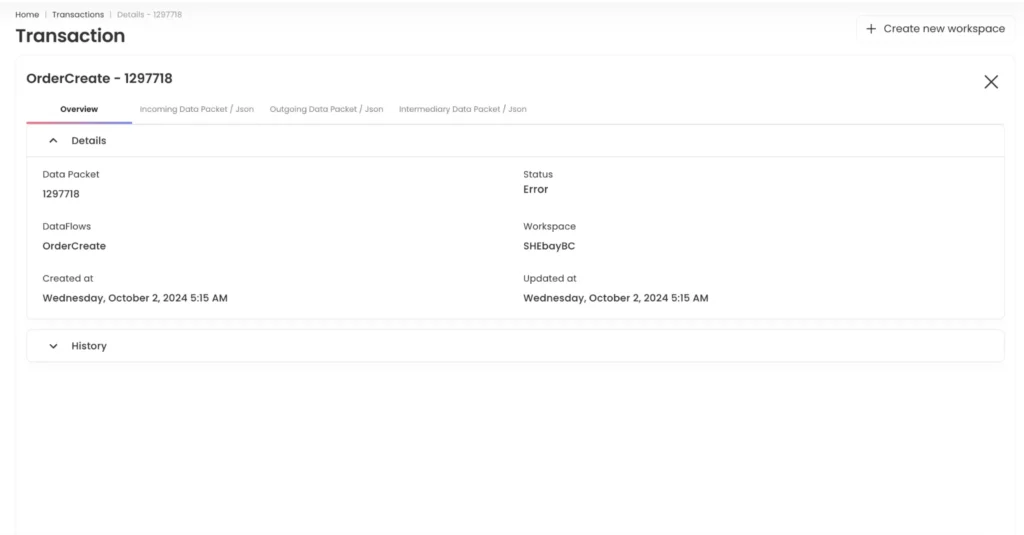
Overview Tab
Displays general information about the transaction, including:
- Data Packet: The unique ID of the transaction.
- DataFlow: The type of data flow (e.g., OrderCreate).
- Created at: The timestamp when the transaction was initiated.
- Status: Displays the result of the transaction (Error or Success).
- Workspace: Identifies the workspace where the transaction occurred.
- Updated at: The time of the last update to the transaction.
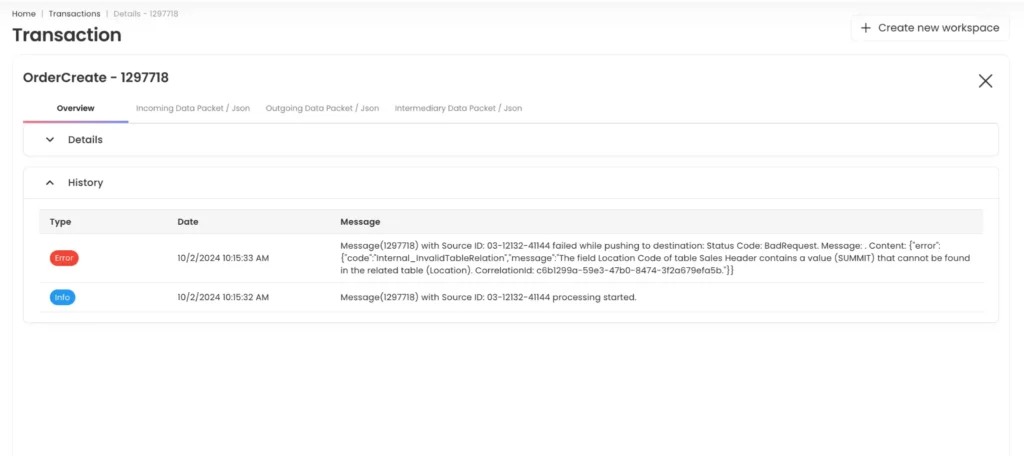
History Section
Located below the Overview section, the History tab provides a timeline of events related to the transaction. Each entry logs:
- Type: The type of event (Error, Info).
- Date: Timestamp when the event occurred.
- Message: Detailed description of the event, such as error codes, processing messages, or status updates. This section helps users trace the lifecycle of the transaction, showing both successes and failures.
Incoming Data Packet / JSON Tab
- This tab displays the raw JSON or XML content of the incoming API request.
- URL: The API endpoint called for the transaction.
- Request Body: The content of the incoming request (in JSON or XML format), which includes data such as customer details, order information, and any relevant metadata.
- Request Query Parameters: Additional parameters included in the API request, such as company codes.
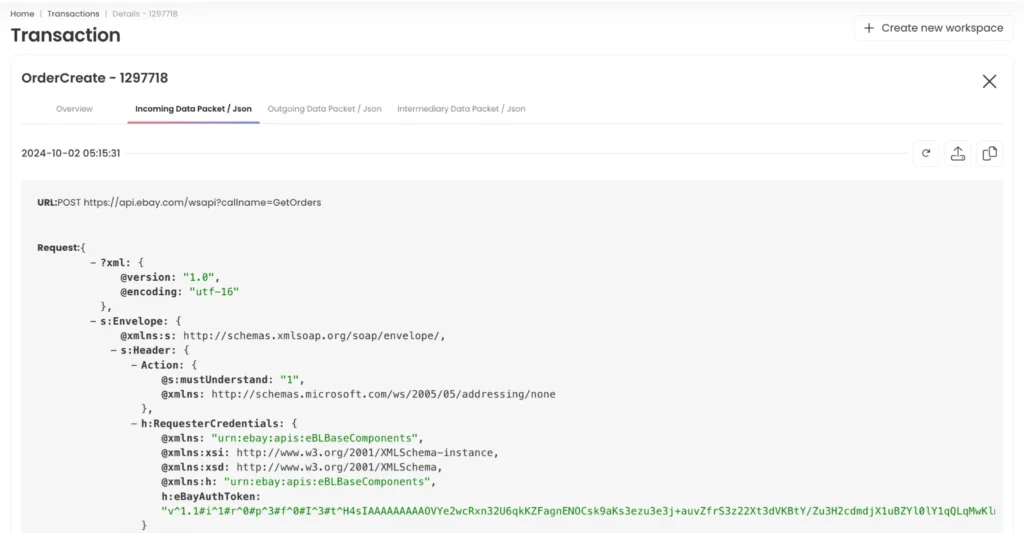
Action Buttons:
- Retry: Allows the user to reattempt processing the transaction in case of errors.
- Download: Lets users download the JSON/XML data packet for offline analysis.
- Copy: Copies the entire data packet content or URL for quick reference.
Outgoing Data Packet / JSON Tab
- This tab contains the raw JSON or XML content of the outgoing API request.
- URL: The API endpoint that received the outgoing request.
- Request Body: The data sent to the external system, such as customer or order data.
- Response Data: The content of the response received from the external system, showing whether the request was successful or if any errors occurred.
- Processing Time: Shows how long it took for the request to process.
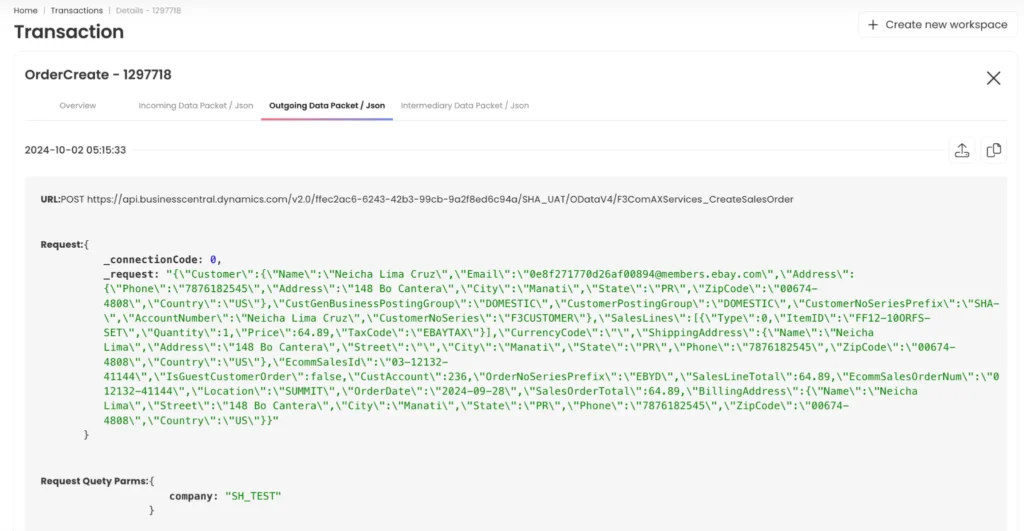
Action Buttons:
- Download: Downloads the outgoing data packet.
- Copy: Copies the URL or data packet content.
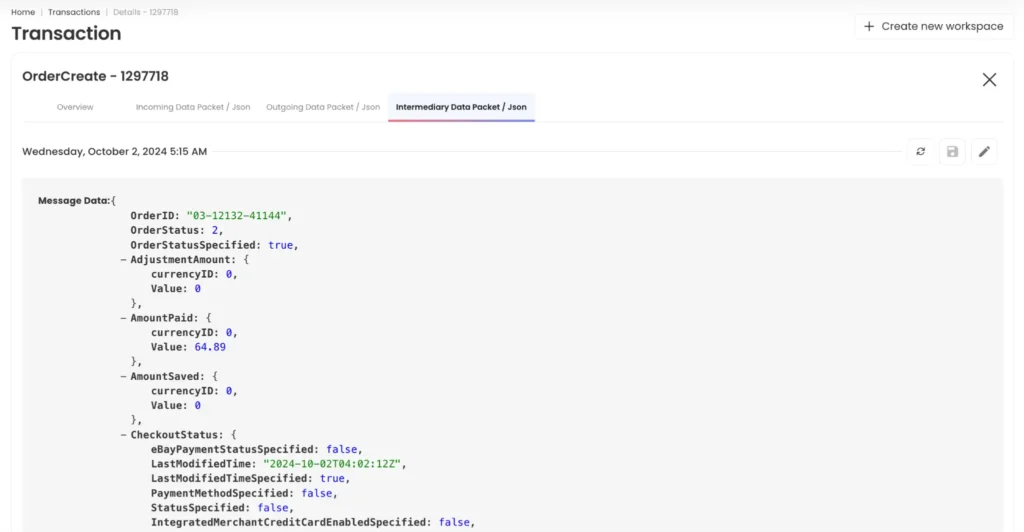
Intermediary Data Packet / JSON Tab
- This tab provides details of any intermediary data packets that were involved in the transaction. These packets represent data transformations or intermediate API requests used in complex data flows.
- Intermediary Data: Displays the content and structure of the data at this stage, showing how it has been transformed or formatted before reaching its final destination.
Action Buttons:
- Retry: Retries sending the intermediary data packet in case of issues.
- Edit: Allows editing of the intermediary data packet.
- Save: Saves any changes made to the intermediary packet.