Create your First Integration Workflow
Let’s get started with your first unified integration workflow in BURQ iPaaS. This guide demonstrates how product and order data can seamlessly flow between Shopify, and D365 then extend to ShipStation for shipping and fulfillment.
This workflow showcases the platform’s capability to establish bi-directional, low-code data flows between ERP, e-commerce, and logistics systems using a middleware architecture that promotes scalability, modularity, and minimal human intervention.
Purpose
Organizations often manage complex product catalogs and transactions within ERP systems like D365. At the same time, e-commerce platforms such as Shopify and fulfillment providers like ShipStation are critical for customer-facing sales and delivery.
Manual updates across these systems lead to:
- Errors in product catalogs and inventory.
- Delays in order processing and fulfillment.
- High operational overhead.
Automating this integration through BURQ ensures:
- Reduced duplication and manual effort.
- Accurate and real-time data sync across different systems.
- Timely order fulfillment through ShipStation.
- A repeatable integration pattern extendable to invoices, returns, or inventory management.
System Overview
BURQ functions as a cloud-based middleware. It does not make changes to your source or destination systems. Instead, it facilitates communication between APIs through configurable data pipelines.
Core components (For your First Integration):
- Producer ( Source): Shopify
- Consumer (Destination): Microsoft Dynamics D365
- Fulfillment System (Logistics): ShipStation
- Transport Layer: APIs exposed by all three systems
- Data Flow: Logical path order data takes from Shopify to ERP to ShipStation
- Transformation Layer: Field mapping and business logic reconciliation
- Control Layer: Retry mechanisms, kill switches, and log management
Step-by-Step Workflow
Step 1: Shopify→D365-OrderCreate
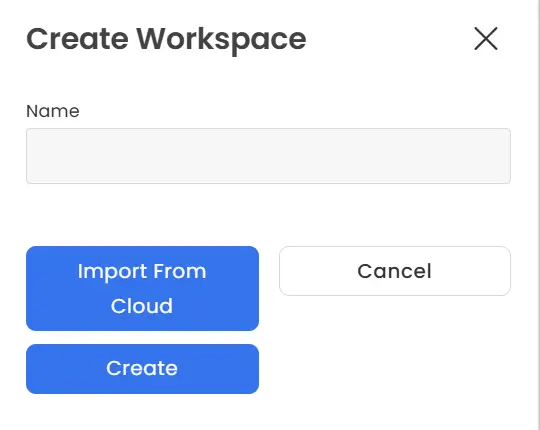
- On the Workspace page at the top right, click “Create new Workspace”.
- Name the Workspace and create it. You can also import the workspace from Cloud.
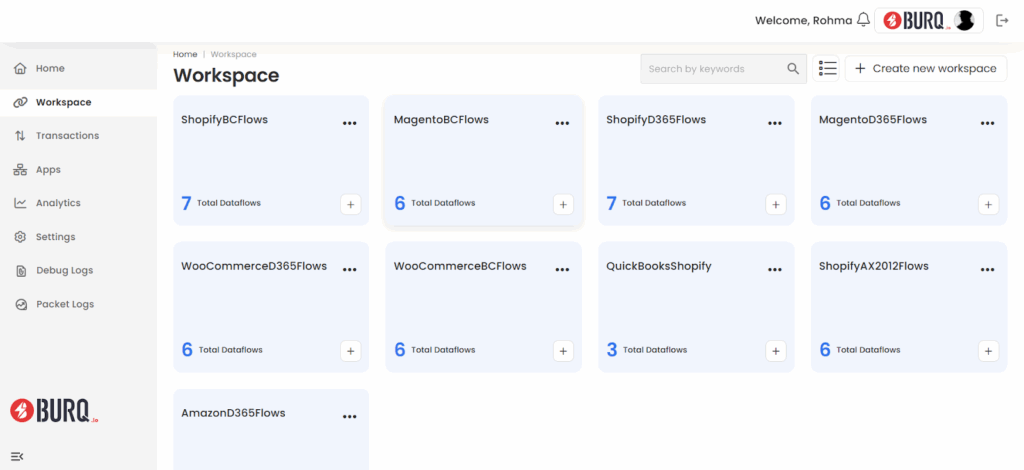
- Each integration is encapsulated in a workspace, which acts as a container for related data flows. For this integration,we have created a “D365-Shopify” workspace.
- In the workspace you can create different dataflows by clicking the “+” icon.
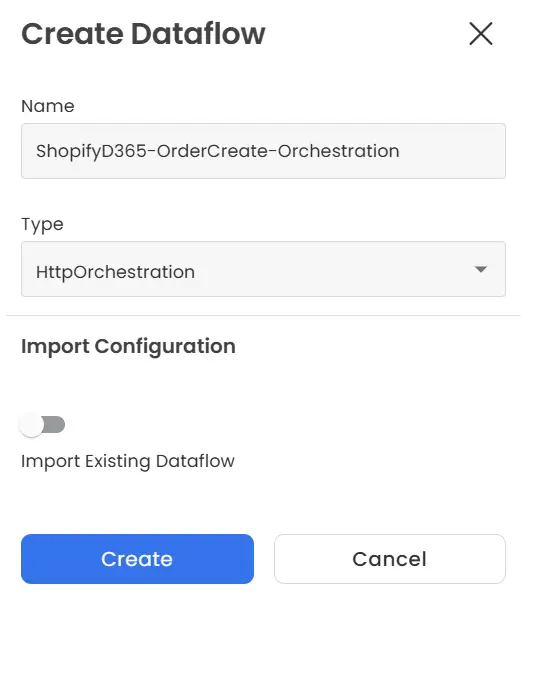
- Name the dataflow and select type “HttpOrchestration” to create the dataflow.
- In this example we have created a ”ShopifyD365-OrderCreate-Orchestration” dataflow.
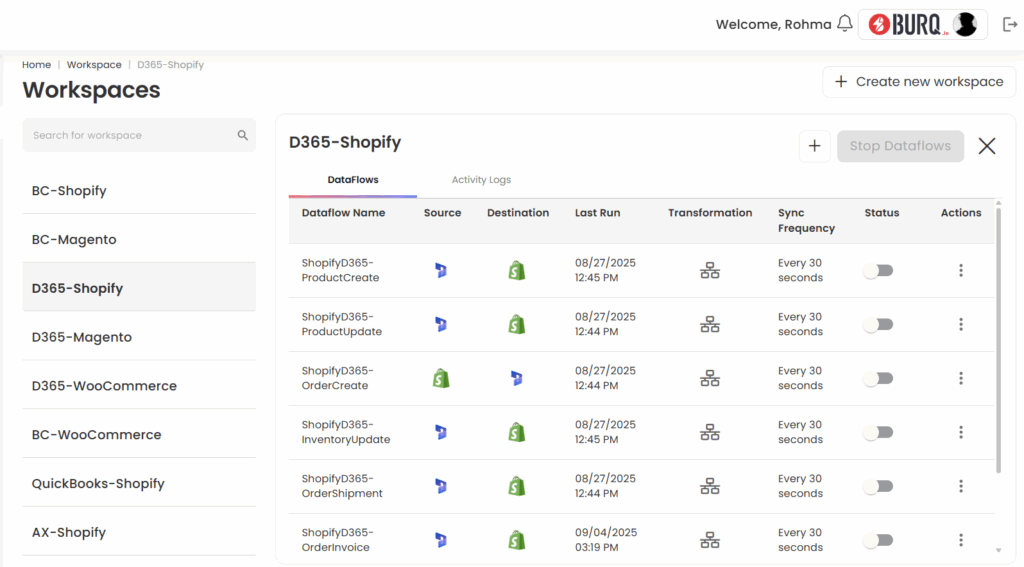
- Click the dataflow you created and go to orchestration.
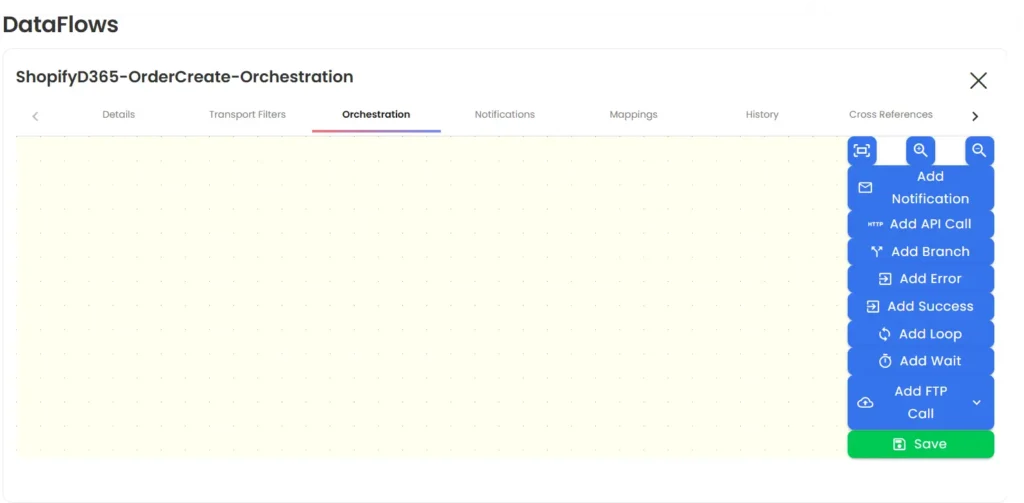
- The Orchestration tab is where you visually design and manage your integration workflow. This is a drag-and-drop interface that allows you to define the sequence of actions, conditions, and error handling between connected systems such as Shopify and D365.
-
When you first open the Orchestration tab, you’ll see a blank canvas (as shown in the screenshot above). On the right-hand side, you have a toolbox of components you can drag into the workflow, including:
-
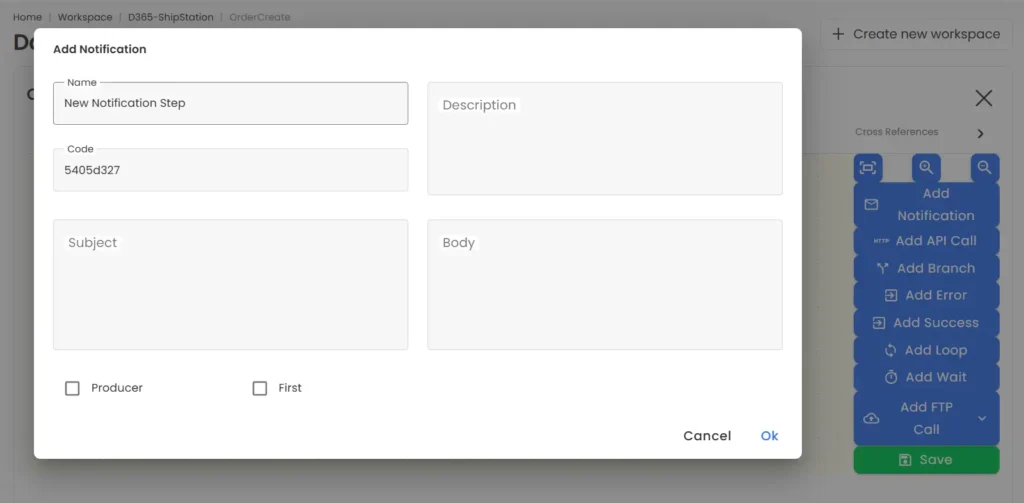
Notification: Sends out a message (email, alert, or log entry) at a defined point in the flow.
- Name & Code – Unique identifiers for the step.
- Subject & Body – Content of the notification.
- Producer/First – Flags to mark the step as an entry point or producer.
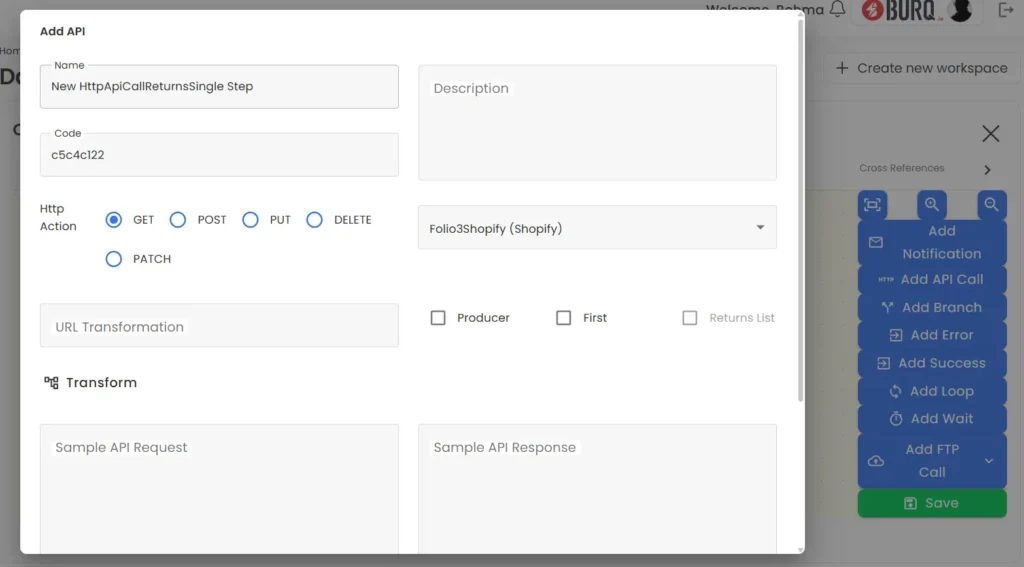
- API Call: Executes an HTTP call to an external system or connector
- HTTP Action – GET, POST, PUT, DELETE, PATCH.
- Connector – Select the integration (e.g., Shopify, ShipStation).
- URL Transformation – Dynamically build endpoint URLs.
- Sample Request/Response – Define input and output structures for mapping.
-
Notification: Sends out a message (email, alert, or log entry) at a defined point in the flow.
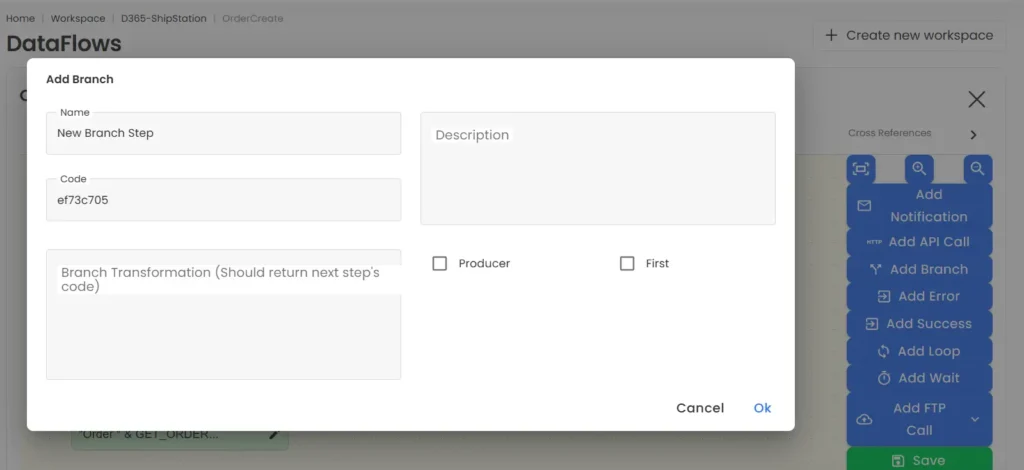
- Branch Step: Adds conditional logic into the flow. Insert branch transformation (Custom expression that returns the next step’s code based on condition).
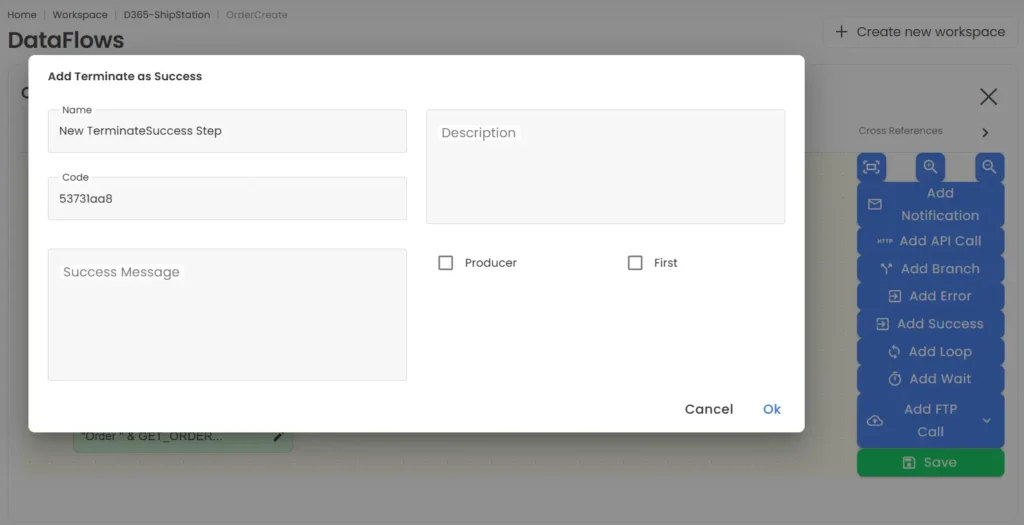
- Terminate as Success Step: Ends the flow with a successful completion message. You can add custom text to confirm successful execution.
- Add Error: Define error-handling logic and termination messages.
- Add Loop: Repeatedly execute steps for a collection (e.g., loop through line items).
- Add Wait: Pause the flow until a condition or time passes.
- Add FTP Call: Exchange files with an FTP server (useful for legacy EDI or batch processes)
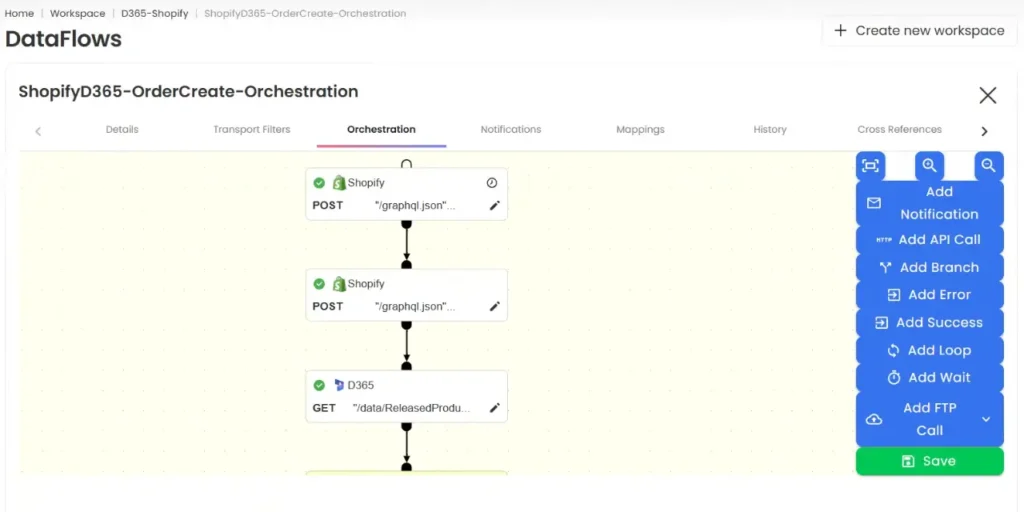
- Once you start adding components, the canvas will evolve into a structured workflow. For example, in the Shopify to D365 order creation flow:
- The process starts with Shopify API calls to fetch order details.
- A D365 API call retrieves product data from Released Products.
- A Branch checks whether the item exists in D365:
- If not found, an Error node is triggered.
- If found, the workflow continues to order creation.
- The system then attempts to create the order in D365.
- A second Branch checks if the order was successfully created:
- If yes, the flow moves to a Success node.
- If not, it routes to an Error node with a failure message.
This drag-and-drop orchestration ensures no-code workflow design while still allowing for complex, conditional integrations. The visual flow makes it easy to see where the process succeeds, where it can fail, and how exceptions are handled.
Shopify in the backend shows new order when customer makes a purchase
Step 2: D365→ShipStation-OrderCreate
- Create another workspace “D365-ShipStation”, and within this workspace create D365-ShipStation (Fulfillment) “OrderCreate” dataflow as an orchestration flow by following the guidelines provided in step 1.
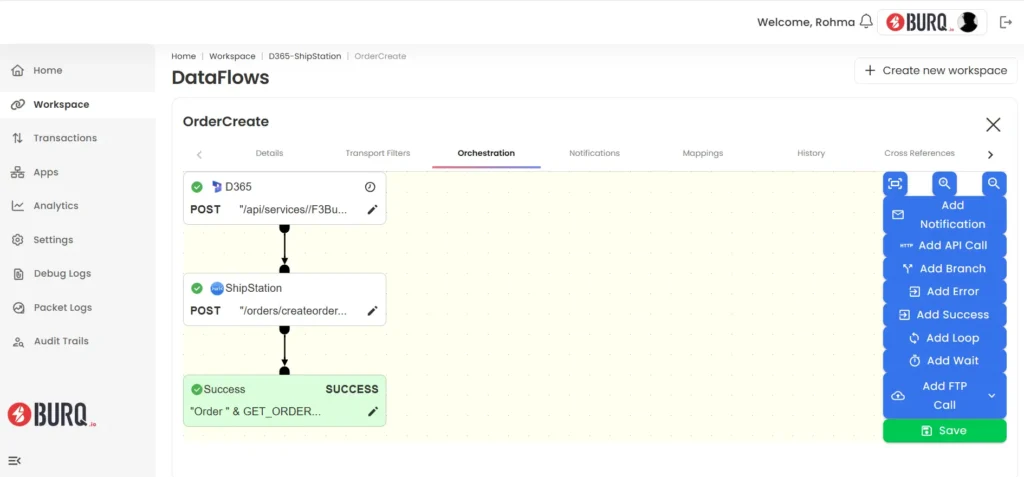
- After the order is pushed from Shopify to D365 (from Step 1), the workflow continues in step 2 as:
- D365 API Call – Extract order data from D365.
- ShipStation API Call – Push order to ShipStation.
- Success Step –The flow ends with a Success node, confirming the order is processed across Shopify, D365, and ShipStation
Orders appear in ShipStation Awaiting Shipment
Once marked as Shipped, notifications are sent back to D365 and Shopify
Step 3: Shipstation→D365-ShipmentCreate
- In the D365–ShipStation workspace, create a new dataflow named “ShipmentCreate”.
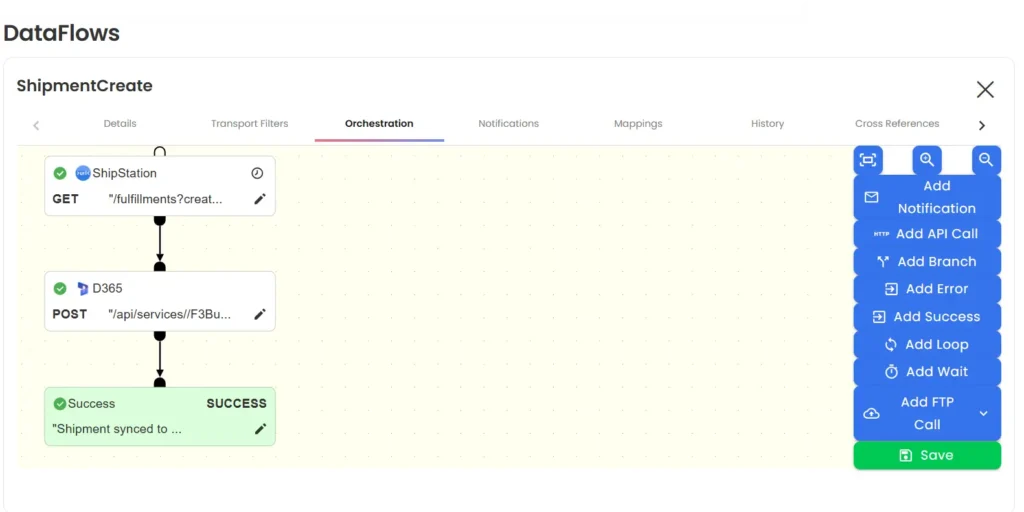
- In this flow, ShipStation acts as the source system. The orchestration fetches shipment details from ShipStation and pushes them into Dynamics 365, ensuring orders are marked as shipped in D365.
- ShipStation GET Call – The workflow retrieves fulfillment details from ShipStation.
- D365 POST Call – These shipment details are then posted to Dynamics 365.
- Success Node – Once the sync is complete, the workflow ends with a success message (“Shipment synced to D365”).
Order appeared as ‘Delivered’ in D365
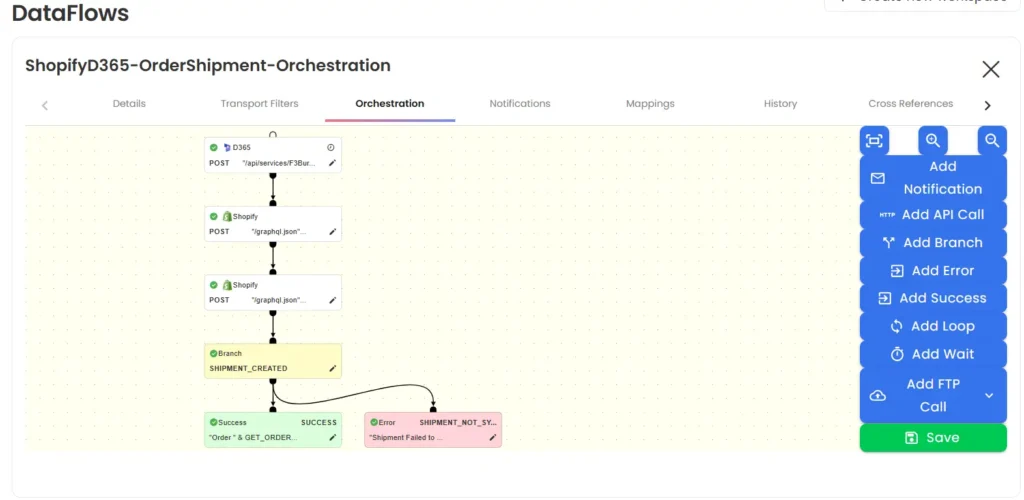
Step 4: D365→ Shopify-OrderShipment
After an order is shipped in Dynamics 365, the details must sync back to Shopify so customers see real-time fulfillment updates.
- In the D365–Shopify workspace, create a new dataflow named “OrderShipment-Orchestration”.
- D365 API Call – Pull shipment details from Dynamics 365.
- Shopify API Call – Push fulfillment info (tracking number, carrier, status) to Shopify.
- Branch Check – If successful, the flow ends at a Success node (“Order & Shipment Synced to Shopify”). If not, it routes to an Error node (“Shipment Failed to Sync”).
You’ve now created your first end-to-end integration workflow in BURQ iPaaS, connecting Shopify, Dynamics 365, and ShipStation. From capturing orders to updating shipments back in Shopify, your systems are now working together with minimal manual effort. This workflow not only gives you a solid foundation but also serves as a template you can extend to returns, invoicing, or inventory management as your integration needs grow.