Quick Start
Account Setup
Before you begin creating integrations in BURQ IPaaS, the first step is to set up your account and access the platform.
Signing In
To access BURQ, open the platform URL provided to you in the invitation email. If this is your first time accessing the platform, click the invite link in the email to activate your account and set your password.
Once your password is created, log in using your registered email address and password. For security verification, an OTP (One-Time Passcode) will be sent to your email. Enter the OTP on the login screen to complete the sign-in process.
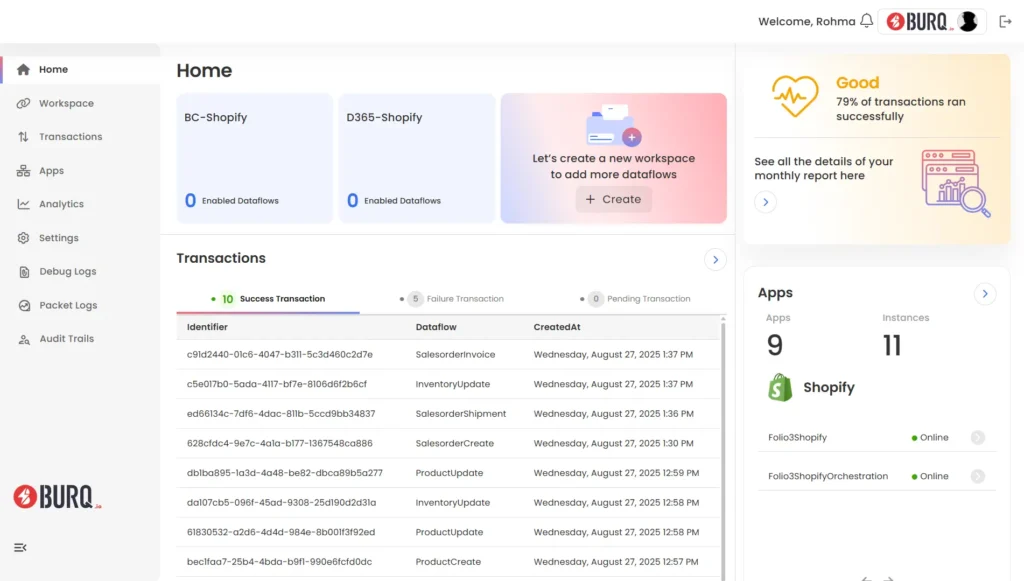
After successful verification, you will land on the dashboard, where you can view existing workspaces, create new ones, or navigate to dataflows, logs, and system configurations.

Platform Access and Permissions
User accounts in BURQ are provisioned during onboarding according to the deployment scope defined by your organization. If you are added to an existing BURQ workspace, you will receive an email invitation containing the activation link. After setting your password and completing OTP verification, you can sign in to access the assigned workspace(s).
Upon login, the dashboard displays all workspaces and integrations associated with your account. Users with standard permissions can create and configure new workspaces and dataflows as required. Access levels and role-based permissions are managed by workspace administrators or the BURQ implementation team in alignment with organizational policies.
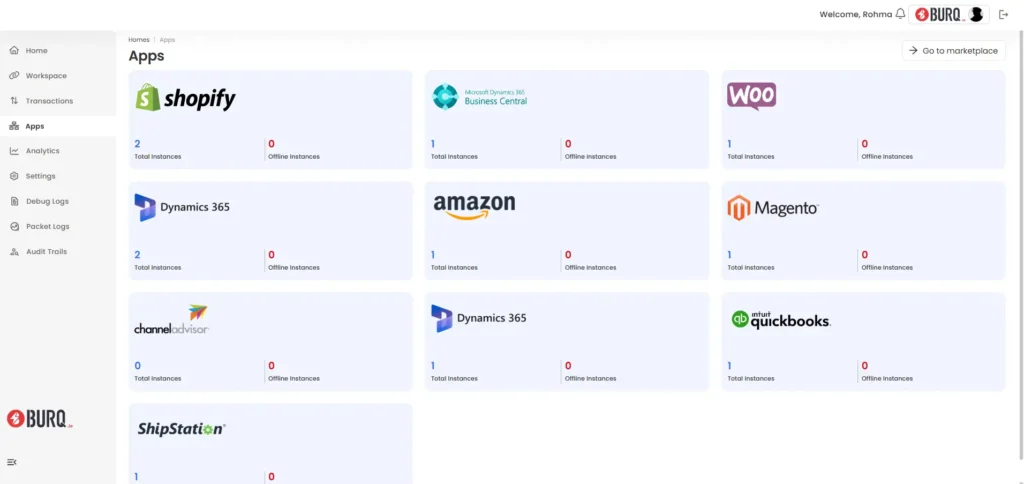
Pre-Configured Applications
During the initial deployment, BURQ is configured with predefined connectors for core business systems (e.g., Shopify, WooCommerce, Microsoft Dynamics 365 Business Central, Microsoft Dynamics 365 Finance & Operations). These appear in the Apps tab or are available during dataflow configuration. Additional system connections can be established by authorized users with the appropriate credentials or in coordination with the BURQ implementation team.
Workspace Creation
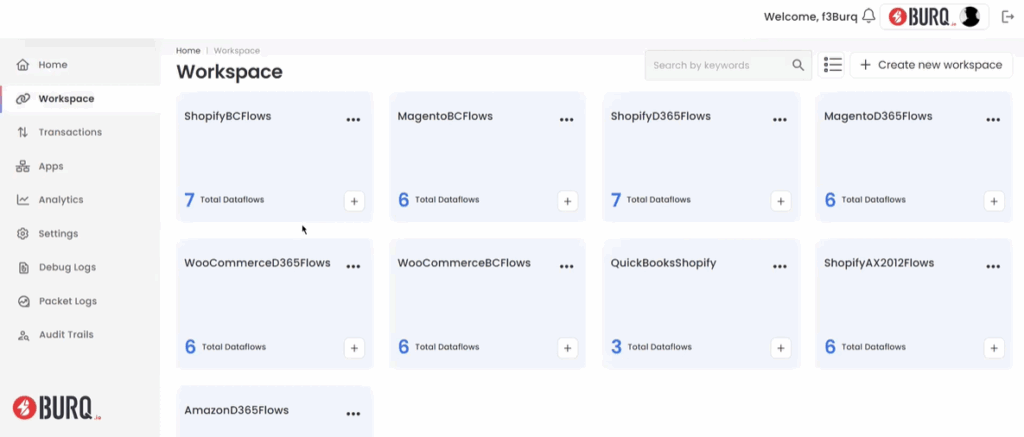
BURQ iPaaS provides an organized environment called a workspace, designed to manage and execute multiple integrations efficiently and securely. Each workspace is a logical boundary that contains one or more dataflows, where each dataflow connects two applications, a source and a destination, facilitating effortless data movement and transformation.
Workspaces play a critical role in access control, monitoring, and error handling, making them a central building block of the platform’s integration model.
Creating a Workspace
To create a new workspace:
- From the left navigation menu, go to Workspaces.
- Click “Create New Workspace.”
- Enter the required details
You can also observe data flows and activity logs in the workspace.
Why and When to Create a Workspace
Workspace is an organized place that keeps a set of dataflows. Within each workspace, you can create multiple dataflows to synchronize various types of data between any two systems. However, these dataflows can be linked to any source and any destination within the system offered applications and can either reside in a single workspace or be distributed across many. Organizing workspaces based on specific conditions can help efficiently manage data synchronization logs. You should consider creating a new workspace in the following situations:
Changing Source or Destination Application
Each dataflow within a workspace assumes a consistent application context. If either the source or destination changes across integrations, it’s recommended to isolate them in distinct workspaces.
Example:
You have the following application matrix:
- Shopify
- WooCommerce
- Dynamics 365 Business Central
- Dynamics 365 Finance & Operations (F&O)
If you are syncing:
- Shopify → Business Central
- WooCommerce → F&O
Then, each pair should have its workspace for clearer separation of logs, API credentials, and error handling.
Different Instances of the Same Application
Create a new workspace where the instance of the same source or destination changes. For example, if you have two Shopify stores, each one to be integrated with another application, which could be an ERP or any other application, it’s recommended to create two workspaces, one for each integration.
This enables:
- Separate API authentication and token refresh logic
- Isolation of rate limits and usage metrics
- Instance-specific logging and debugging
Identical Dataflows Across Business Domains
Workspaces can be grouped not just by systems but also by business functions.
Example:
If you’re syncing financial transactions, such as:
- Payments
- Returns
- Settlements
Even if the sources/destinations vary (e.g., Stripe, NetSuite, SAP), it’s beneficial to keep them in a shared workspace for financial reporting teams. This supports unified monitoring and batch retry capabilities.
Role-Based Access Control (RBAC)
Workspaces can be permissioned separately. You can assign access at the workspace level for:
- Developers
- QA/Testers
- Business Analysts
- Operations staff
This ensures controlled access to sensitive data or production dataflows.
Environment Isolation
Each workspace in BURQ iPaaS acts as an isolated unit, enabling controlled management of integrations. Key benefits include:
- Independent configuration of connectors, data flows, and schedules
- Separation of execution to avoid interference between flows
- Scoped logging and monitoring for better traceability
- Safe testing without affecting other workflows or data
Monitoring & Observability
All logs, status codes, and retry attempts are workspace-specific. The logging engine captures:
- API request/response payloads
- Timestamps
- Error traces
- Retry attempts and backoffs
This allows granular monitoring and isolation of faulty flows.
Import / Export Workspaces
To enhance deployment efficiency across tenants or environments, BURQ supports an Import from Cloud feature. This allows reusing the configuration of an existing workspace, including all dataflows, mappings, and credentials (excluding secrets)—in a new instance.
Exporting a Workspace
- Initiate export to cloud storage from the source environment.
- Configuration, flow definitions, and transformation logic are serialized and versioned.
- Useful for backup or replication.
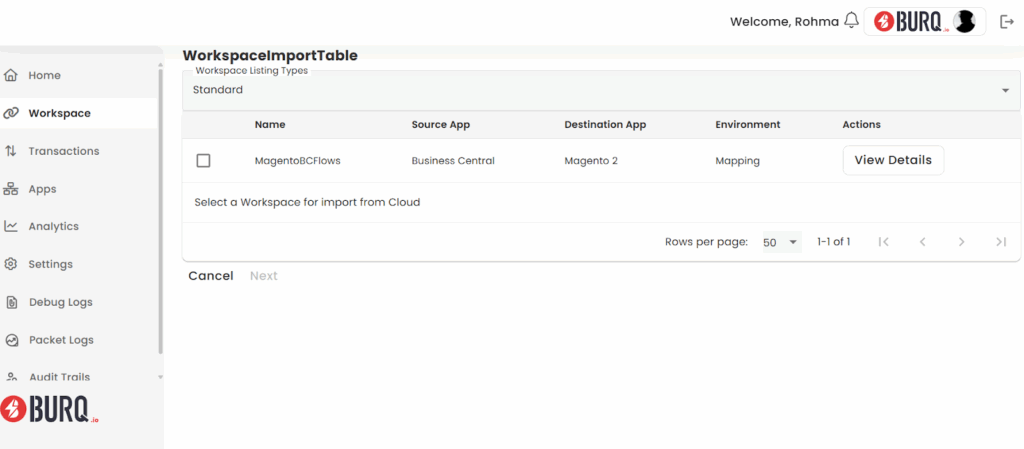
Importing a Workspace
Steps:
- Navigate to “Import From Cloud.”
- View a list of all exported workspaces tied to your tenant across environments.
- Select the desired workspace.
- Review and import.
Post-Import Actions:
- Reconfigure API keys or environment variables.
- Test webhook endpoints.
- Enable dataflows manually after verification.
This process ensures quick cloning of tested integration pipelines, improving DevOps productivity and maintaining consistency across environments.
Best Practices for Workspace Management
| Practice | Benefit |
| Group dataflows by business function (e.g., Orders, Payments) | Easier audit, role-based visibility |
| Create separate workspaces for each production vs. test environment | Prevents test data leaks into live systems |
| Use consistent naming conventions for workspaces (e.g., ERP_Shopify_Prod) | Easier tracking, standardized deployments |
| Limit each workspace to ≤ 10–15 active dataflows | Keeps runtime overhead low, improves troubleshooting |
| Review workspace activity logs weekly | Ensures flow health and uptime metrics |
Error Detection
BURQ includes a powerful set of monitoring and troubleshooting tools designed to help you track integrations, identify issues, and maintain smooth operations across your ERP and connected platforms. These tools provide real-time and historical visibility, ensuring that you can quickly detect and resolve any data flow or transaction problems.
At a high level, BURQ offers:
Transactions
Every action processed between your ERP and external platforms is captured here. Whether it’s an inventory sync to Shopify or an order creation in Dynamics 365, the Transactions view provides an at-a-glance record of what was processed and its status. You can also take quick recovery actions, such as retrying failed operations.
Debug Logs
For deeper insights, Debug Logs record detailed runtime activity across services. These are particularly useful for administrators or developers who need to trace where and why an integration may have failed.
Packet Logs
Every API call, both request and response, can be examined through Packet Logs. This helps validate whether data was sent or received correctly between systems and is essential when troubleshooting communication errors.
DataFlow History
If you want to review a specific process, such as customer synchronization or order updates, the DataFlow History page provides a timeline of events with success or error messages for each step.
Batch History
For performance and auditing, Batch History summarizes activity on a daily basis, showing totals of successful, failed, or retried transactions. This gives you a clear picture of system health over time.
Together, these tools provide visibility at multiple levels, from single transactions to overall daily performance. In the Quickstart, it’s enough to know they are available and what they cover.
In the full Monitoring and Troubleshooting Guide, you’ll find detailed instructions on using filters, analyzing logs, retrying failed transactions, and applying best practices for diagnosing integration issues.